Traditional Crème Caramel Recipe: Smooth French Custard That Unmolds Cleanly
Crème caramel is a classic French baked custard with a layer of caramel on the bottom that becomes a sauce when the dessert is unmolded. It is different from crème brûlée because the caramel is poured into the ramekin before baking, not torched on top after chilling. I make it when I want a make-ahead dessert that feels traditional, clean, and elegant without needing pastry dough, frosting, or decoration.
This recipe is based on my YouTube video for traditional crème caramel, with a few small adjustments since publication to make it easier to reproduce at home. The original proportion works, but I prefer to clarify the caramel water, the ramekin size, the chilling time, and the doneness cues because those details make a big difference. The mistake to avoid is baking the custard until it is completely stiff. What I look for here is a set edge with a slight wobble in the center, almost like soft gelatin.
This version is firmer than a very delicate restaurant custard because it uses whole eggs. That is intentional. I make it this way because it unmolds cleanly and gives that old-school French crème renversée texture many of us grew up with. If you want a softer custard, I explain the adjustment below, but for a traditional crème caramel that holds its shape on the plate, this ratio works.
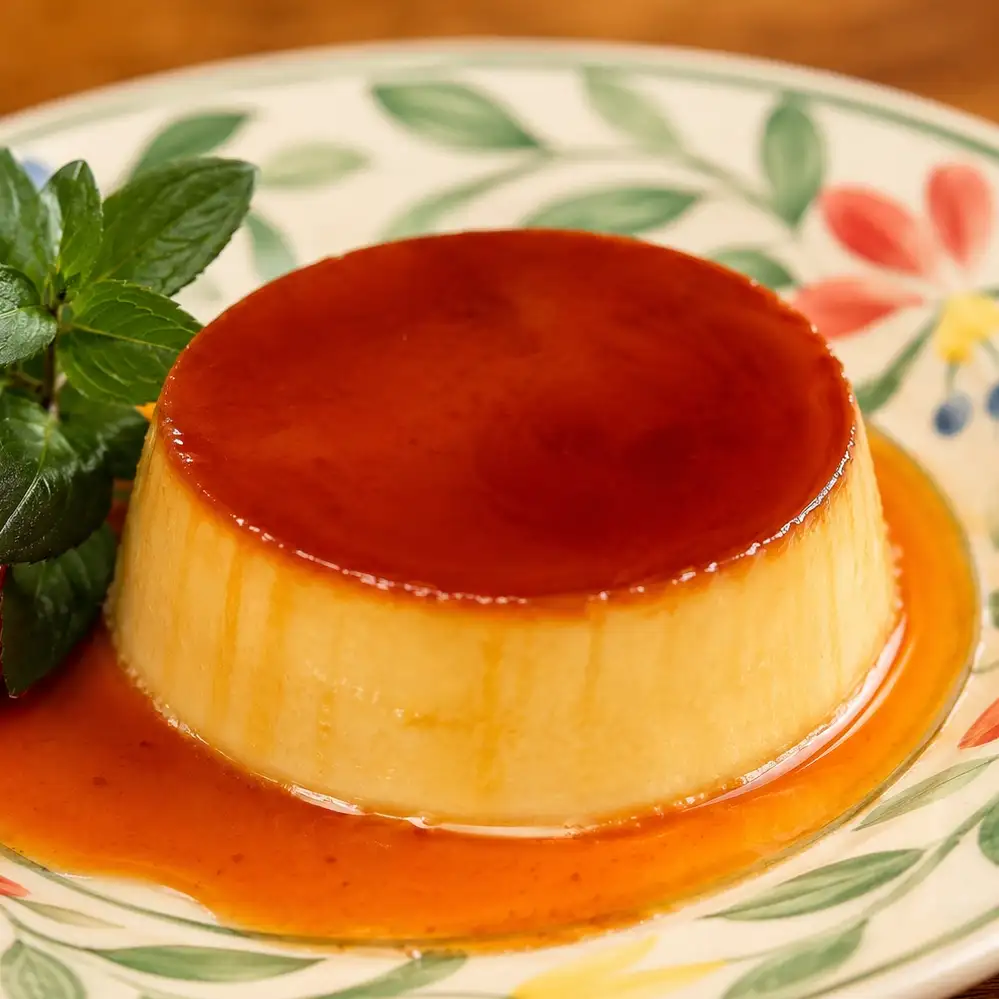
What Makes This Version Different
This is the traditional baked custard version, not a quick pudding, not a no-bake dessert, and not a cream-heavy pot de crème. The texture is smooth but structured. It slices softly with a spoon and releases a thin caramel sauce around the base.
On the site, this recipe fits beside other creamy desserts but it does not compete with them. If you want a spoon dessert cooked on the stovetop, my creamy vanilla rice pudding is more rustic and comforting. If you want a frozen vanilla dessert, homemade vanilla ice cream is richer and colder. If you want something chocolate-based and more bakery-style, chocolate profiteroles go in a completely different direction.
This one is about eggs, milk, caramel, and gentle heat. Nothing more complicated than that, but the heat has to be respected.
Ingredients You Need
The ingredient list is short: sugar, water, milk, eggs, vanilla, and a small pinch of salt if you want better balance.
For the caramel, I use sugar with a little water. Dry caramel works too, but for home cooking I prefer the wet method because the sugar melts more evenly and gives you a bit more time to watch the color. Once the syrup starts bubbling, avoid stirring. Swirl the pan gently if one side is coloring faster than the other.

For the custard, whole milk gives the best balance. Skim milk will set, but it tastes thinner. Cream makes it richer, but then it starts moving away from the clean, traditional character of crème caramel. This is not meant to taste like cheesecake or custard cream. It should taste like milk, eggs, vanilla, and caramel.
If you bake often and like checking measurements, my cup, gram, and milliliter conversion guide is useful for switching between Canadian, American, and metric-style recipes.
Step-by-Step Instructions
Start by preheating the oven to 300°F. Place the rack in the center. You want gentle, even heat, not aggressive browning.
Make the caramel first. Add the sugar and water to a small saucepan and heat over medium-high heat. At first, the syrup will look clear and bubbly. Then the bubbles become thicker and slower. Watch the edges of the pan because that is where the color usually starts. You are looking for an amber caramel, not pale yellow and not dark brown. When it smells toasted but not bitter, remove it from the heat immediately.


Divide the hot caramel between six ramekins. Tilt each ramekin carefully so the caramel coats the bottom. Be careful here because caramel is much hotter than boiling water. Let the ramekins sit at room temperature while you make the custard.
Warm the milk until it is steaming and just under a simmer. I do not want a rolling boil. If the milk boils hard, it can make the final texture taste more cooked than creamy.

In a bowl, whisk the eggs with the sugar, vanilla, and a small pinch of salt. Whisk enough to combine, but do not beat like you are making an omelet. The more foam you create now, the more bubbles you risk seeing later in the finished custard.


Slowly pour the hot milk into the eggs while whisking gently. This is the tempering step. Go slowly at the beginning so the eggs warm up without scrambling. At this point, it should look fluid, pale, and smooth, with maybe a little foam on top.
Strain the custard through a fine sieve. I do this every time. It catches small bits of egg, possible shell fragments, and extra foam. A strained custard always looks cleaner after baking.


Pour the custard into the caramel-lined ramekins. Place the ramekins in a deep baking dish and add hot water around them. The water should come halfway to two-thirds up the sides of the ramekins. The mistake to avoid is splashing water into the custard.


Bake until the edges are set and the center still trembles slightly when the dish is moved. Usually this takes 40 to 50 minutes, depending on ramekin size. You know it is ready when the custard is no longer liquid in the middle, but it is not stiff either. If you use a knife test, the knife should come out mostly clean, not bone dry.
Let the ramekins cool at room temperature, then refrigerate for at least 4 hours. Overnight is even better. Chilling gives the custard time to firm up and lets the caramel loosen into a sauce.

To unmold, run a small knife around the inside edge of the ramekin, keeping the blade close to the dish. Place a plate on top, flip, and give it a few seconds. You should hear or feel the custard release. Lift the ramekin slowly and let the caramel run naturally over the top.

Why the Water Bath Matters
The water bath protects the custard from direct oven heat. Without it, the outside cooks too fast while the center is still loose. That can give you curdled edges, little holes, and an eggy texture.
A good water bath should be hot when it goes into the oven, but it does not need to be violently boiling. I prefer hot tap water or kettle-hot water poured carefully around the ramekins. The goal is steady, gentle heat.
For more general baking and cooking temperature checks, the internal cooking temperature chart is a helpful reference, especially when switching between ovens or testing doneness by temperature.
Texture and Doneness Cues
This is where crème caramel succeeds or fails.
If the custard is underbaked, it will collapse when unmolded and the center may look loose. If it is overbaked, it can turn rubbery and show small bubbles inside. The best point is in between: set, but still tender.

What I look for here is a gentle wobble. Move the baking dish slightly. The center should jiggle, but not ripple like liquid milk. The surface should look smooth and lightly glossy, not puffed or cracked.
If you see bubbles forming aggressively around the sides during baking, the oven is probably too hot. Lower the heat slightly next time or check that the water bath is deep enough.
Substitutions and Adjustments
For a softer custard, use 4 large eggs instead of 5. It will be more delicate, but also a little more fragile when unmolding.
For a richer texture, use 3 whole eggs plus 2 egg yolks. This gives a smoother custard with less firmness from the egg whites.
For the milk, whole milk is best. You can replace a small amount of the milk with half-and-half if you want a richer result, but I would not use all cream for this version.
For vanilla, use extract, paste, or the seeds from a vanilla bean. Vanilla paste gives little specks and a deeper aroma.
For the caramel, do not replace granulated sugar with brown sugar. Brown sugar contains molasses and can make the caramel taste heavier and less clean.
A pinch of salt is optional, but I recommend it. It does not make the dessert salty. It just makes the caramel and vanilla taste rounder.
Health and Nutrition Context
This is a traditional dessert made with eggs, milk, and sugar. It is not a low-sugar recipe, but it is also not overloaded with butter, cream, or pastry. One ramekin gives a moderate portion with some protein from the eggs and milk, plus the sweetness of the caramel.
I like serving it as a small dessert after a heavier meal because it feels light on the spoon. It is creamy, but not dense like a cheesecake. For another lighter-style creamy dessert, the vanilla cottage cheese pudding goes in a more modern, protein-focused direction.
Make-Ahead and Storage
Crème caramel is best made ahead. Four hours is the minimum chill time, but overnight is the safest choice if you want clean unmolding.
Keep the ramekins covered in the refrigerator for up to 3 days. I prefer unmolding right before serving because the caramel sauce looks fresh and the custard holds its shape better.
Do not freeze crème caramel. The custard can separate and turn watery after thawing.
What to Serve With Crème Caramel
I usually serve it plain because the caramel is already the sauce. A small mint leaf or a few berries are enough if you want color on the plate.
For a dessert table, pair it with something crisp or baked so the textures do not all feel the same. apple crisp with oats brings warm fruit and a crumbly topping. peach cobbler with canned peaches is a good year-round fruit dessert when fresh peaches are not in season. For cookies, one-bowl sugar cookies keep the vanilla theme simple.
If you want a richer tray of sweets, add brown sugar blondies, no-bake cheesecake bars, or browse the easy chocolate dessert collection for something more intense.
FAQ
Why did my crème caramel have bubbles?
Usually the oven was too hot, the custard was whisked too much, or the water bath was too shallow. Whisk gently, strain the mixture, skim the foam, and bake slowly.
Why did the custard taste eggy?
It may have been overbaked. This recipe uses whole eggs, so it is naturally firmer. Bake only until the center has a slight wobble, then chill fully.
Can I make crème caramel the day before?
Yes. In fact, I prefer to make it the day before. The texture firms up, the caramel softens into sauce, and unmolding becomes easier.
Can I use 4 eggs instead of 5?
Yes. Four eggs will make a softer custard. It may be slightly more delicate when unmolding, but the texture will be silkier.
Do I need to cover the ramekins while baking?
Not usually. If your oven runs hot or the tops are drying, you can loosely cover the baking dish with foil, but do not seal it tightly.
Why did the caramel harden in the ramekins?
That is normal at first. As the custard chills, moisture slowly dissolves the caramel and turns it into sauce.
Can I make one large crème caramel instead of ramekins?
Yes, but the baking time will be longer. Use the same water bath method and bake until the center is just set with a slight wobble.

Traditional Crème Caramel
Ingredients
- For the caramel
- 1/2 cup granulated sugar
- 2 tbsp water
- For the custard
- 2 cups plus 2 tbsp whole milk
- 5 large eggs
- 1/2 cup granulated sugar
- 1/2 tsp vanilla extract
- 1 small pinch salt optional
- Optional garnish
- Fresh mint leaves
- Fresh strawberries
Instructions
- Preheat the oven to 300°F. Place the oven rack in the center position.
- In a small saucepan, combine 1/2 cup sugar and 2 tbsp water. Cook over medium-high heat until the caramel turns amber. Do not stir once it starts boiling. Swirl the pan gently if needed.
- Divide the caramel between 6 ramekins, about 4 to 5 oz each. Tilt carefully to coat the bottoms. Let sit at room temperature while preparing the custard.
- Heat the milk until steaming and just under a simmer. Do not boil.
- In a mixing bowl, gently whisk the eggs, sugar, vanilla, and salt. Avoid making too much foam.
- Slowly pour the hot milk into the egg mixture while whisking gently.
- Strain the custard through a fine sieve. Skim off any foam from the surface.
- Pour the custard into the caramel-lined ramekins.
- Place the ramekins in a deep baking dish. Add hot water around them until it reaches halfway to two-thirds up the sides of the ramekins.
- Bake for 40 to 50 minutes, until the edges are set and the centers still wobble slightly.
- Remove from the water bath. Cool at room temperature for 30 to 45 minutes, then refrigerate for at least 4 hours, preferably overnight.
- To unmold, run a small knife around the inside edge of each ramekin. Place a plate on top, flip, wait a few seconds, then lift the ramekin slowly.
Video
Notes
FAQ
Why did my crème caramel have bubbles?
Usually the oven was too hot, the custard was whisked too much, or the water bath was too shallow. Whisk gently, strain the mixture, skim the foam, and bake slowly.Why did the custard taste eggy?
It may have been overbaked. This recipe uses whole eggs, so it is naturally firmer. Bake only until the center has a slight wobble, then chill fully.Can I make crème caramel the day before?
Yes. In fact, I prefer to make it the day before. The texture firms up, the caramel softens into sauce, and unmolding becomes easier.Can I use 4 eggs instead of 5?
Yes. Four eggs will make a softer custard. It may be slightly more delicate when unmolding, but the texture will be silkier.Do I need to cover the ramekins while baking?
Not usually. If your oven runs hot or the tops are drying, you can loosely cover the baking dish with foil, but do not seal it tightly.Why did the caramel harden in the ramekins?
That is normal at first. As the custard chills, moisture slowly dissolves the caramel and turns it into sauce.Can I make one large crème caramel instead of ramekins?
Yes, but the baking time will be longer. Use the same water bath method and bake until the center is just set with a slight wobble.🔗 Useful Links
🛒 Michel Dumas Shop : Explore our kitchen essentials, including aprons and knives.
🌐 Linktree : Access all our important links in one place.
📱 YouTube | Instagram | Facebook | TikTok : Follow us for the latest recipes and culinary tips.


